
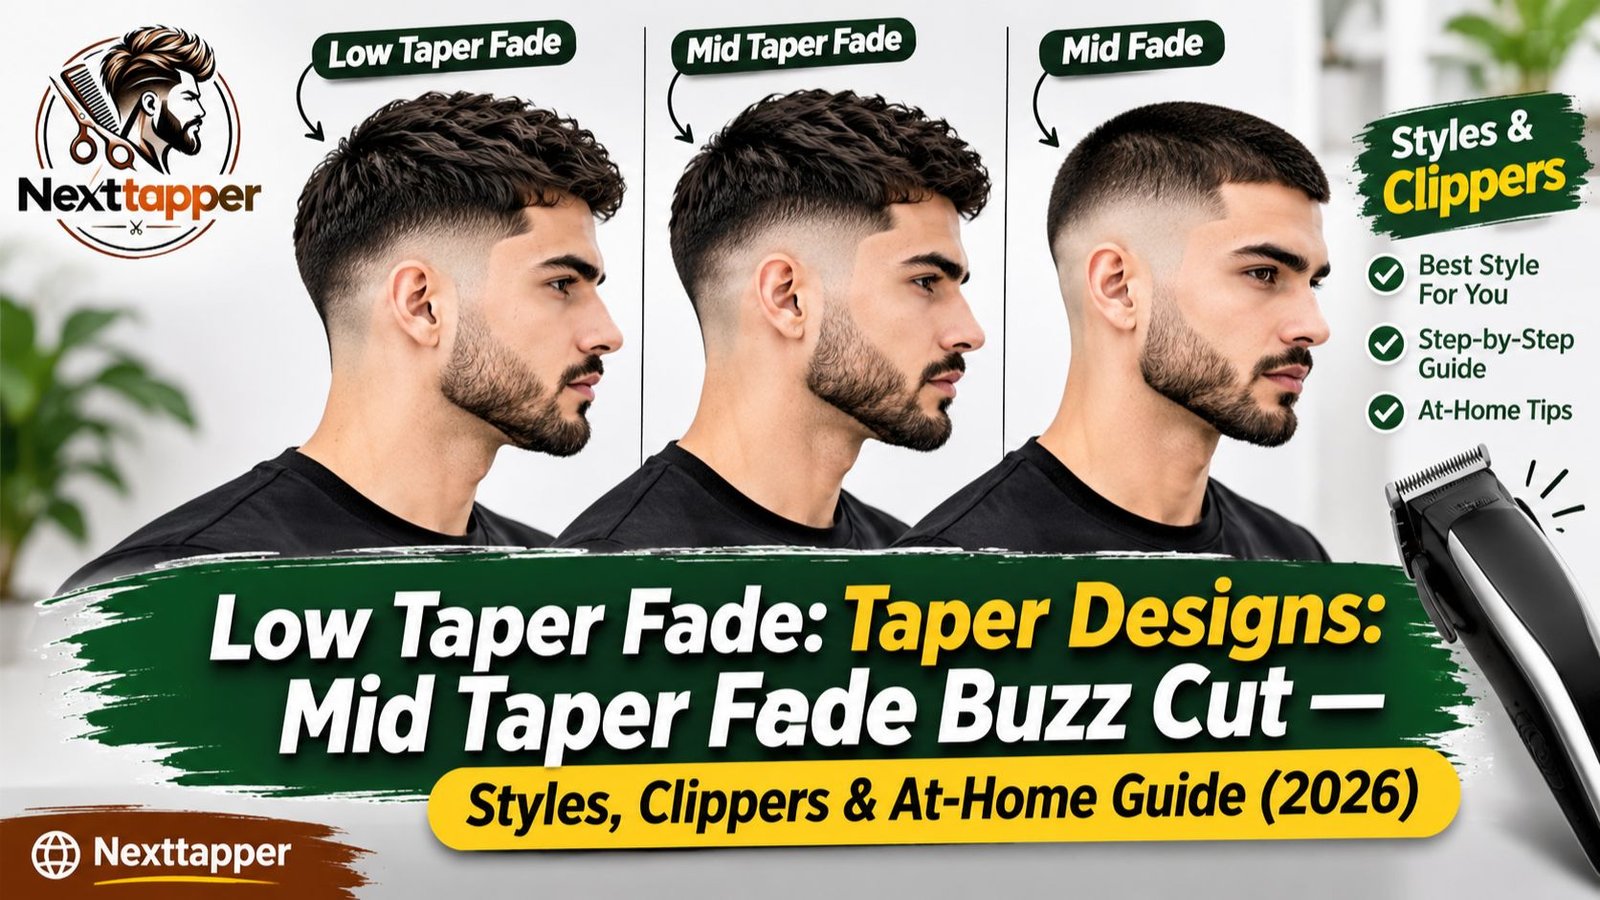

A buzz cut is one of the simplest haircuts to maintain. Add a mid taper fade and you keep that simplicity while gaining a cleaner, more shaped look at the sides. The cut works in an office and on a weekend, and many people who cut their own hair start with it.
This guide explains what a mid taper fade buzz cut is, walks through five popular variations, and covers the guards and clippers you need for a home version. You’ll also see how barber and DIY options compare on cost and time, plus the signs that it’s time to book a professional.
In short, a mid taper fade buzz cut is a short, even top with sides that taper from mid-height down to the neck. It’s easy to maintain and forgiving for beginners, but the blend still takes practice. The sections below explain which version fits your head, which guard and clipper to use, and when a barber is worth the visit.
What Is a Mid Taper Fade Buzz Cut?
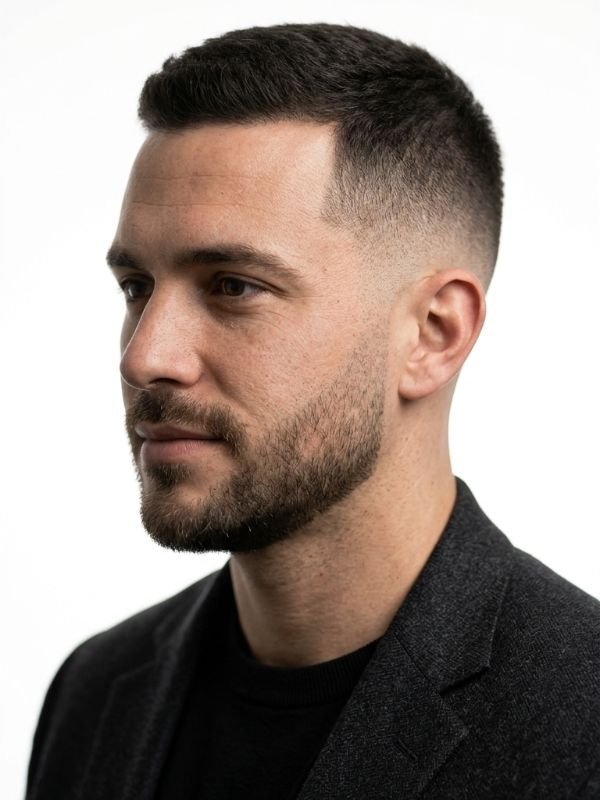
A mid taper fade buzz cut combines two ideas. The top and upper sides stay at one short, even length, the way a classic buzz does. Below that, the sides and back taper down toward the neck, and the blend starts at mid-height. Many barbers place that starting point about an inch above the ear, though the exact spot depends on head shape and the finish you want.
The “taper” part matters. A taper shortens hair gradually and usually stops short of bare skin, which keeps the finish soft. A fade goes further, often to the skin, which creates more contrast. Barbershop names overlap, so describe the finish when you book instead of relying on one word.
| Cut | Top | Sides and back | Contrast |
| Classic buzz | One even length | Same length as the top | Low |
| Mid taper buzz | Short, even length | Taper starts at mid-height and shortens toward the neck | Moderate |
| Mid skin buzz | Short, even length | Tapers down to bare skin | High |
| High and tight | Narrow strip of longer hair | Shaved close, with a sharp line above the temples | Very high |
The mid taper buzz sits in the middle of this range. It looks neater than a classic buzz because the sides shorten gradually, but it stays softer than a skin fade. That makes it a practical choice for people who want shape without much daily effort or a bold look.
Hair type matters too. Thick or dense hair shows the taper clearly, while finer hair may need a slightly longer top to look full. Think of the mid taper buzz as the balanced option in this family, and the other versions as adjustments to contrast and length.
Why Mid Taper Fade Buzz Cut Is So Popular in 2026
Style guides keep recommending this cut for a few practical reasons:
- It’s low maintenance. The top needs no daily styling. The taper is the only part that needs regular attention.
- It fits many settings. The taper is softer than a skin fade, so it works in most offices, schools, and casual settings.
- It suits many face shapes. One style guide notes that modern fades suit most face shapes, and the buzz top keeps the focus on bone structure rather than hair.
- It’s a realistic first home cut. A buzz top uses one guard length, so there’s less to get wrong than with a scissor-blended top. A basic buzz is generally easier to attempt than a high and tight.
- It’s easy to plan around. Since the top doesn’t need restyling, the schedule depends mainly on how fast the taper line grows out.
The trade-offs are real, though. The taper needs visits every few weeks to stay crisp, and the cut shows less personality than a textured or skin version. If you want the look without much upkeep, plan the schedule from the start rather than waiting until the sides look shaggy.
5 Mid Taper Fade Buzz Cut Variations
These five variations change the length on top, the finish at the bottom, or the texture on top. Each one builds on the same mid taper base.
1. Classic Buzz with Mid Taper Fade
The top stays one even length, often a #2 or #3 guard, and the sides taper from mid-height down to a short finish at the neck. This is the most conservative version, and it suits offices, schools, and anyone who wants little to think about. A shorter guard gives a sharper look. A slightly longer guard gives more coverage, which some people prefer if their hair is fine or thinning. Look at your scalp in a mirror before you choose. If you can see a lot through the hair, a longer top guard will look fuller.
Best for: office-friendly looks and anyone who wants the least daily effort.

2. Burr Cut with Mid Taper Fade
A burr cut is a step up from the induction cut, with a little more length on top. Styled with a 1 or 2 guard, the top usually sits roughly 1/8 to 1/4 inch long. The mid taper adds a clean transition from that length down to the neck. One style guide warns that a burr can expose sparse areas on thinning hair, so check your scalp in a mirror before you choose this version.
Best for: thicker hair that benefits from a little extra length and a clean, classic finish.

3. Textured Buzz with Mid Taper Fade
A textured buzz keeps the top slightly longer, then adds movement with point cutting or a light product. This works well on thicker or wavier hair, where texture adds dimension and stops the top from looking flat. The mid taper keeps the sides crisp, which balances the softer top. Point cutting takes practice, so many people have a barber do the top.
Best for: thicker or wavier hair that looks flat in a standard buzz.
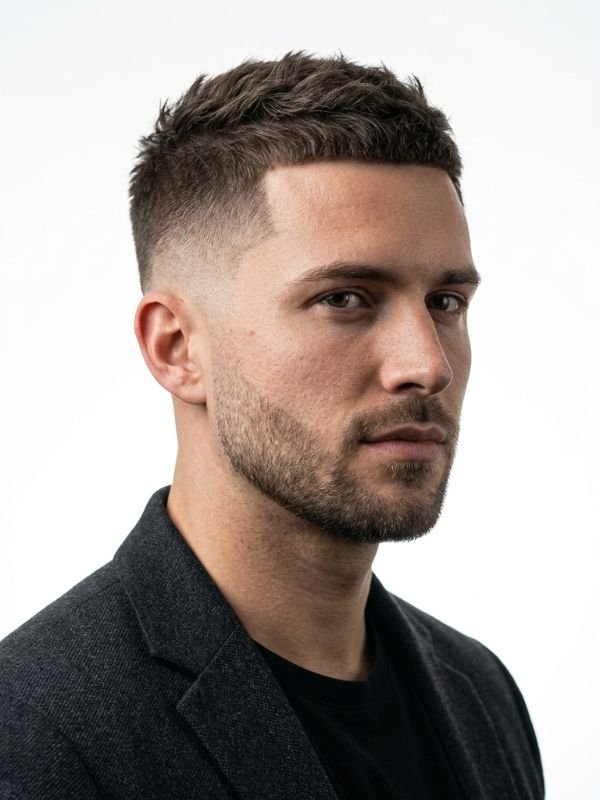
4. High-and-Tight with Mid Taper Fade
A high and tight shaves the sides and back up above the temples and leaves a longer strip on top, with a sharp transition rather than a blend. Shops use this label loosely. In one common version, the high and tight’s strong upper line stays, while the lower back and neck are softened with a mid taper. The result has more contrast than a standard mid taper buzz. Because the transition sits high and doesn’t blend, it’s harder to do at home than a simple buzz.
Best for: people who like a strong, military-inspired silhouette and can visit a barber regularly.
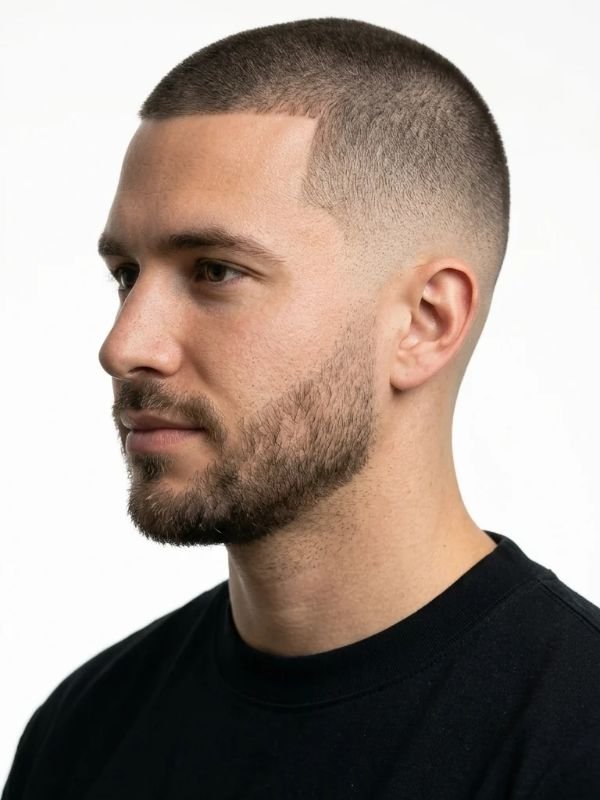
5. Skin Buzz with Mid Taper Fade
A skin buzz takes the sides and neck down to bare skin while the top stays a short, even buzz. Style guides describe this as a short, uniform top paired with sides tapered to the skin. Contrast is high, and the scalp shows, so it needs sun protection and frequent visits. One maintenance chart suggests returning every one to two weeks for skin-level high fades, so this version is a poor first attempt at home.
Best for: people who want maximum contrast and can keep up with frequent visits.
Choosing between these versions comes down to three questions. How much contrast do you want? How often can you visit? How much styling do you enjoy? If the answers are moderate contrast, regular visits, and little styling, the classic or mid taper buzz is the safest pick. If you want a bolder line and don’t mind frequent upkeep, a skin buzz or a high-and-tight-style cut may suit you. Texture-focused versions work best on thicker hair that needs more shape on top.
Guard Numbers & Clippers for a DIY Buzz Cut
Guard numbers tell you how much hair the clipper leaves behind. A higher number leaves more hair, so you can always move to a shorter guard later, but you can’t put length back. Keep that rule in mind throughout the process.
Guard Number Chart for the Top
| Guard | Length (inches) | Length (mm) | Common buzz use |
| 0 or 1/2 | About 1/16 inch | About 1.5 mm | Near-skin finish, varies by brand |
| 1 | 1/8 inch | 3 mm | Short buzz, common taper end point |
| 2 | 1/4 inch | 6 mm | Classic buzz |
| 3 | 3/8 inch | 10 mm | Longer buzz, comb-able top |
| 4 | 1/2 inch | 13 mm | Longer buzz or crew-style base |
| 5 | 5/8 inch | 16 mm | Taper top, brushed styles |
| 6 | 3/4 inch | 19 mm | Longer top for brushing |
Guard lengths can differ slightly between brands, so measure the markings on your own set. Some clippers also list open and closed lengths, and the taper lever changes the cut between those settings.
Choosing the top guard. The right number depends on your hair:
- Fine or thinning hair: a #3 covers more scalp, so the top looks fuller.
- Thick, dense hair: a #2 keeps the shape close and shows the taper clearly.
- Curly hair: a longer guard, such as a #3, avoids cutting curls shorter than you want, since curls shrink as they dry.
- Strong skin contrast: a #1 or lower gives a sharper, more striking finish, but it shows any unevenness faster.
If you’re unsure, start one guard longer than you think you need and check the result in daylight before you go shorter.
Choosing Clippers for a Buzz Cut
A buzz cut is forgiving of small clipper differences, but the right tool still matters. Look for these features:
- Taper lever. This lever fine-tunes the length between guard sizes. Lift it for a closer cut, lower it for slightly more hair. It’s the main tool for softening the transition.
- Sharp, self-sharpening blades. Dull blades pull and snag, which makes the cut look uneven and uncomfortable.
- A motor suited to your hair. Thick or coarse hair needs more power. Trimmers are built for small areas and can struggle across a full head.
- Cordless or corded. Cordless models let you move freely around your head. Corded models give steady power. Many budget cordless models list around 60 minutes of runtime, which covers a few cuts.
- Clearly marked guards. Color-coded or labeled guard combs prevent mix-ups, which is one of the most common beginner problems.
- Price. A popular entry-level cordless model with color-coded guards has been listed around $40. Professional-grade sets cost more, so compare current prices before you buy.
The main clipper types compare like this for a buzz cut:
| Clipper type | Best for | Watch out for |
| Budget cordless with color-coded guards | Beginners and quick touch-ups | Shorter battery life and less power on thick hair |
| Professional-grade cordless | Frequent cutting and thick hair | Higher price |
| Corded | Longer sessions and steady power | The cord limits movement around the head |
| Trimmer | Sideburns, ears, and the neckline | Not built for a full-head buzz |
Tools That Make the Blend Easier
Clippers do most of the work, but a few extras make the transition cleaner:
- A fine-tooth comb to lift sections and check the length.
- A cape or old towel to catch hair and keep your shoulders clean.
- Sharp scissors for blending the top into the sides, if your top is longer than a buzz.
- Two mirrors. A wall mirror at eye level and a hand mirror let you see the back.
- Sectioning clips to hold the top out of the way.
- A trimmer for sideburns, ears, and the neckline.
- A cleaning brush and clipper oil. Clean and oiled blades run cooler and quieter, and they cut more evenly.
How to Do a Mid Taper Fade Buzz Cut at Home
Work slowly. The first attempt often takes 45 to 90 minutes, which is a common estimate for beginner fades. Once you know the motions, a simple buzz with a taper takes much less time.
Before you pick up the clippers, run through this quick checklist:
- Hair is clean, dry, and combed out.
- Clippers are charged or plugged in, with blades clean and oiled.
- Guards are labeled and laid out in the order you’ll use them.
- You have a mirror at eye level and a hand mirror for the back.
- You know where the blend line will start.
- You have about an hour free, so you aren’t rushing the last section.
Step-by-Step DIY Process
- Prep the space. Start with dry hair, put on your cape, set up two mirrors, and lay out your guards and oil. Make sure the blades are clean before you begin.
- Mark the blend line. Use a comb to find a point about an inch above the top of your ear. This is where the taper begins.
- Cut above the line with your top guard. Use the guard you chose for the buzz, such as a #2, on the upper sides and back. This sets the length the taper starts from.
- Step down below the line. Switch to a shorter guard, such as a #1, for the middle section. Overlap each pass slightly so no band shows.
- Taper toward the neck. Move to a shorter setting or close the lever for the lowest section. Work upward against the direction of growth using short, light flicks.
- Soften the bands. Look for darker lines where the length changes. Feather them with the next longer guard using light scooping strokes, and lower the lever slightly if the step looks harsh.
- Cut the top last. Run your top guard from front to back, then side to side. Check that the top matches the upper sides.
- Detail the edges. Trim the sideburns to match on both sides. Lift each ear gently and trim around it with a smaller setting. For the neckline, either step down from #2 to #1 toward the base, or square it off with short dabs.
- Check the back. Brush off loose hair and use the hand mirror to check both sides and the nape. If a patch looks darker, feather it with the next longer guard.
- Clean up. Clean and oil the blades, then let them cool before you store them.
For the first few days after the cut, wash gently and avoid scrubbing the sides, since freshly cut skin can be sensitive. If the finish goes down to the skin, wear sunscreen outdoors and moisturize lightly if the scalp feels dry. Keep the neckline clean between visits so the taper looks intentional rather than unfinished.
Common DIY Mistakes to Avoid
- Starting too short. Begin one guard longer than you think you need. You can always go shorter, but you can’t add length back.
- Pressing too hard. Let the motor do the work. Pressing hard can slow the blades, pull hair, and make the cut uneven.
- Ignoring the taper lever. It’s the main blending tool. Without it, each guard step can look like a separate band.
- Cutting wet hair. Wet hair looks longer and shrinks as it dries. Cut dry hair for accurate results.
- Skipping the back check. The nape is the hardest area to see. Use two mirrors and check it before you finish.
- Going for a skin finish first. Beginners do better starting with a low or taper finish, since there’s more room to correct mistakes.
- Cutting over irritated skin. If your scalp is raw, bumpy, or sore, skip the clippers that day and see a professional or a dermatologist if the problem persists.
- Rushing the last section. The neckline and sideburns are the parts people notice first. Give them the same attention as the top.
- Forgetting the lever on a second pass. A light second pass with the lever adjusted often smooths the bands better than another full pass with a different guard.
Read Also This: 10 Best Mid Taper Fade with Design Ideas for Men (2026)
When to See a Professional Instead
A home buzz can look great, but some situations call for a barber:
- Your hair is very thick, curly, or dense. These textures make blending harder and show mistakes more clearly.
- You want a skin buzz or a sharp high-and-tight line. These need steady hands and precise transitions.
- Your cut has two different lengths with a scissor-blended top. Blending scissor work into tapered sides is usually best left to a barber.
- You have a receding hairline, scalp concerns, or skin irritation. A professional can work around these areas more safely.
- You want a line design or precise line-up. These details need specialized tools and a steady hand.
- You’ve tried a few times and the lines still look uneven. Book a visit and ask the barber to show you the technique on your head.
A professional visit usually covers more than the cut itself. Your barber will check the shape from several angles, adjust the blend line to your ear and temple, tidy the sideburns and neckline, and show you how to keep the look between visits. Many barbers will also tell you how long the cut should last, which helps you plan your next appointment.
Professional Barber vs DIY — Cost & Time Comparison
The two main trade-offs are money and time. Here’s a practical comparison, using local price guides as a reference point.
| Factor | Professional barber | DIY at home |
| Price per cut | $28 to $40 for a fade or taper in one 2026 local price guide | No per-cut fee, only clippers, oil, and occasional replacement guards |
| Time per cut | About 20 to 30 minutes in the chair, plus travel and waiting | About 20 to 30 minutes once practiced; 45 to 90 minutes when starting out (estimate) |
| Visits per year at a 3-week interval | About 17 | Whenever you need |
| Rough yearly cost | About $476 to $680 at 17 visits, before tips | Clippers and supplies, usually a one-time cost |
| Consistency | High, especially for blend and line-up | Improves with practice; the back is hardest |
| Best for | Skin buzzes, designs, and two-length cuts | Simple buzz with a taper and regular touch-ups |
The yearly figures are simple arithmetic: 17 visits multiplied by $28 to $40, not counting tips. A budget cordless clipper set at around $40 costs about as much as one or two barber visits, so it pays for itself quickly if you cut regularly. Keep in mind that clipper prices and barber rates change, so check current figures in your area.
How often you need a cut matters as much as the price per visit. Style guides suggest different intervals for different versions of this look:
| Cut | Typical interval between visits |
| Classic buzz | Every 2 to 4 weeks |
| Mid taper buzz | Every 2 to 3 weeks |
| Skin-level finish | Every 1 to 2 weeks |
These ranges depend on how fast your hair grows and how crisp you want the look to stay. Dense, fast-growing hair usually needs visits sooner, while slower growth lets you stretch the schedule.
DIY cutting has hidden costs too. Plan for replacement guards, blade oil, a cleaning brush, and occasional new blades if the set starts pulling. You may also spend more time on each cut than you expect at first, which is worth counting as part of the cost.
Conclusion
The mid taper fade buzz cut gives you a short, low-maintenance look with a clean transition at the sides. If you want to try it at home, start with a simple classic buzz, use a longer guard than you think you need, and step down slowly with the taper lever. If the cut gets complicated, or you want a skin finish or a design, a barber can handle it in less time than you’d spend learning the technique. Either way, a regular schedule matters more than the tools, so plan your next visit before the taper line starts to fade. Whichever route you choose, start with the simplest version, keep your guards and blades clean, and check the result in good light before you call it finished.
